
Due to a slight misunderstanding, we got a very early start for my microfracture surgery. We were told to be at the surgery center by 5:30 am. We had to leave very early to pull that off! Then, we arrive and the center doesn’t even open until 6am. Needless to say, we were there on time.
The procedure was performed at the Mission Valley Heights Surgical Center. It is a very nice facility with a very nice staff.
Longer than expected
Once I was prepared for the procedure, I don’t remember much. The anesthesiologist put me under and I stayed that way. I have since learned that the surgery lasted a little longer than expected. From what I know, most of the arthroscopic procedures last around 45 minutes. Mine lasted over an hour. In short, my knee was worst than we expected so it took a little longer.
The Surgery
The anticipation for the surgery was that I would get a medial meniscus tear repaired and have two lesions microfractured. That held true, but there was a little more damage, so the fix was a little bigger.
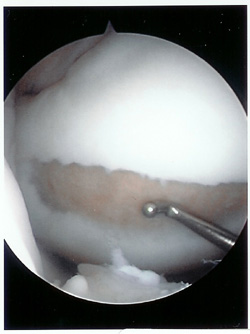
- This is what Dr. Behr saw when he first looked inside.

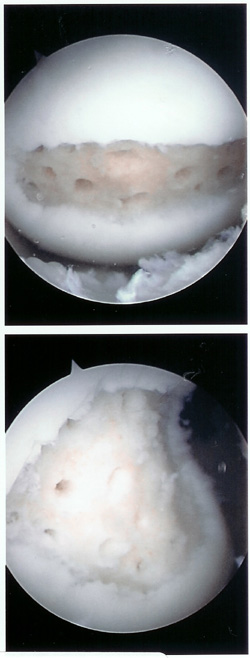
- This is a little more detail of one of the lesions. I think this is the one at the end of my femur.

- This is what the lesion looked like when Dr. Behr finished cleaning it out. He described the ideal lesions to me as looking like pot-holes. I’d say this one looks like a pot hole.
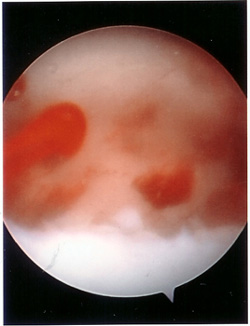
- This is the actual microfracturing. In my case, many 1/4″ deep holes were drilled into the exposed bone. Somewhere the number of hole was said to be around 26. I don’t know, and I haven’t tried to count. There were a lot (in my opinion)
- The key early indicator for success is that the hole bled. Mine did bleed.
Summary of Surgery
Four main things were done in the surgery.
- Repair of the meniscus
- Repair of the large lesion
- Repair of the smaller lesion
- Biopsy of good cartilage for possible future ACI procedure.
Dr. Behr decided to stitch the meniscus instead of cut it out. It was a red/white tear meaning that the stitch may actually help fix things. The main reason for the stitch was to help the load bearing microfracture a better bead for healing. Dr. Behr doesn’t give it a great chance for success, but it will help the microfracture heal, and that is my biggest challenge right now.
The small lesion, in the load bearing area, was 1.0cm by 2.2cm.
The large lesion, more or less under my knee cap, was 2.2cm by 2.5cm. From what I understand, 3.0cm is the maximum size lesion that can be microfractured. This puts it right at about the maximum size.
The biopsy of good cartilage was taken and sent to a clinic as a precaution. The cartilage damage was bad enough that I may need a future repair. My future option is basically either ACI or OATS. The biopsied piece will go and grow in the lab over the next year in case I need it. I hope I don’t, but time will tell.
Disclaimer
This is by no means an analysis of what Dr. Christopher Behr did. He did a great job. This is my interpretation of what I know. I am not an expert in this subject area. And to be frank, I was doped up through the whole procedure. I just hope that it may be helpful to any future microfracture patients.